You can link your LAN (Local Area Network) to VeilNet via a Conflux Portal, allowing secure access for you and your team.
🧭 Step-by-Step Guide #
1. Log In #
Go to https://console.veilnet.org and sign in with your VeilNet account.
2. Access the Conflux Panel #
Navigate to the Conflux tab on the left menu.
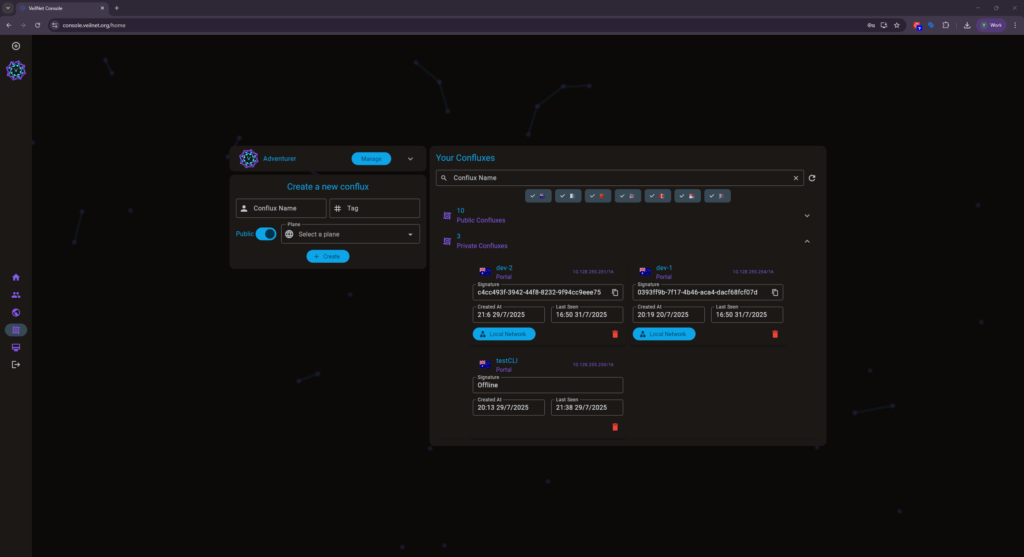
3. Locate Your Conflux #
In the expandable list, find the Conflux Portal you want to configure.
4. Confirm Portal Status #
Ensure your Conflux is:
Online
Running in Portal Mode
If both are true, a Local Network button will appear next to it.

5. Open the Local Network Dialog #
Click the Local Network button to open the configuration dialog.
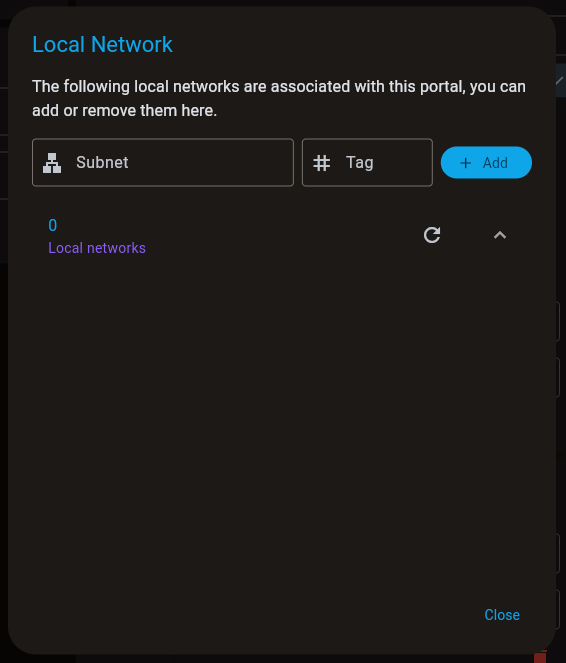
6. Add Your Subnet #
In the dialog:
Enter the Subnet (e.g.,
192.168.1.0/24)(Optional) Add a tag for clarity
Click Add
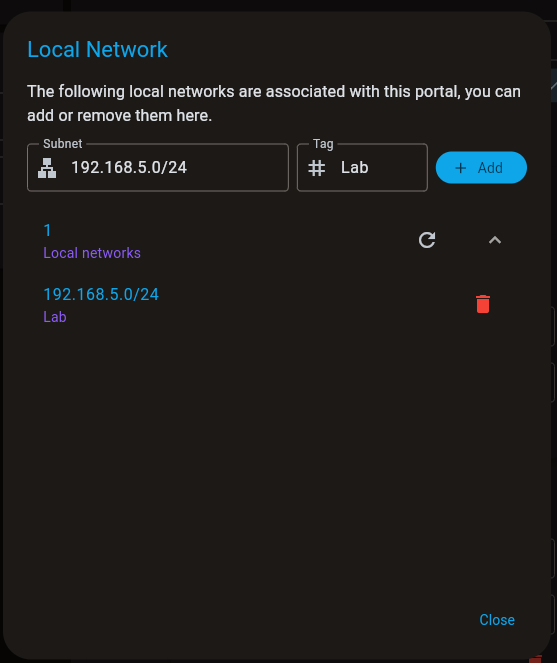
7. Done! #
That’s it — your subnet is now linked to the Conflux Portal and available through the VeilNet plane.
🔐 Important Notes #
👥 Access Control #
All team members will also have access to the subnet by default.
To restrict access, deploy the Conflux Portal in a private plane that is not shared with your team.
🧭 Multiple Portals with Same Subnet #
You can link multiple Conflux Portals to the same subnet.
However, VeilNet has no visibility into whether those portals are on the same physical LAN.
📍 Example:
If Office A has subnet
10.0.0.0/24, deploying multiple Portals at Office A and linking them to10.0.0.0/24is recommended.If Office A and Office B both use
10.0.0.0/24, and both have a Portal linked to that subnet, users may randomly reach either one — be cautious.
🔒 Public Planes Are Still Safe #
Even if your Portal is in a Public Plane, only you and your team members can access the linked local network. No one else can see or reach it.
🆘 Support #
For help or feedback, reach out:
💬 Join the Discord: https://discord.gg/fPQEJGRF


